
This article by Karen Trimble originally appeared in the SHS March 2020 newsletter.
Microgreens have been growing in popularity, springing up in dishes at restaurants and on foodie social media posts. With this growth in popularity, they are available at some local businesses in Saskatoon. These bite-size greens are tasty, nutrient dense, and are a colourful addition to almost any meal.
What are Microgreens?
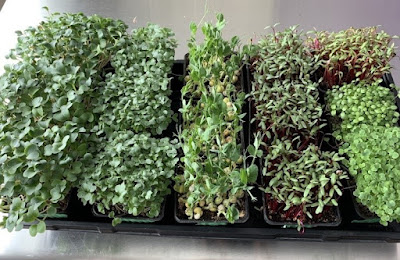
Microgreens are seedlings of vegetables or herbs (sometimes
grains, fruit, or flowers) that are harvested when their first set of true
leaves appear (after the cotyledons) and when the plants are between two to
three inches tall.
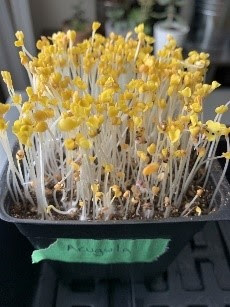
The most common microgreens are fast-growing and harvested within 7-14 days of initial seeding. Some of these include alfalfa, arugula, borage, broccoli, cabbage, clover, corn, cress, kale, kohlrabi, mustard, pak choy, peas, radish, tatsoi, and wheat grass. Slower growing microgreens (harvested in 15-30 days) include: amaranth, anise, basil, beet, carrot, cilantro, dill, fennel, parsley, swiss chard, salad mixes, shiso, and sorrel.
Growing Microgreens at Home
Supplies Needed:
- Trays with drainage holes
- Soilless growing medium (potting soil)
- Grow Lights are essential if growing year-round in Saskatchewan.
- Seeds
- Oscillating Fan (recommended)
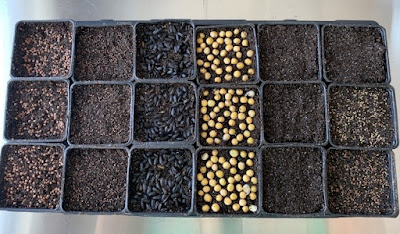
In my setup I like to use one 1020 tray with holes inside
another 1020 tray without holes (allows for bottom watering). Because I like to grow several varieties a
once I have 18 – 8cm (3”) black plastic pots that fit inside these trays. However, any plastic container that is 1”
tall and has drainage holes in the bottom to prevent waterlogging the roots can
work.

There are a variety of growing mediums you can use to grow microgreens including: a soilless medium, coconut coir, or even hydroponics. My preferred growing method is using a sterile soilless growing medium like Sungrow Sunshine Mix. It is light and airy which provides good aeration for the roots, but still retains moisture. Because you are harvesting microgreens at such an early stage of development, rarely will you need to use any fertilizer.
Light Requirements – Microgreens require 15-16 hours of light per day. Natural light from a south facing window will not be adequate most of the year. There are several options for artificial light sources, the most common being fluorescent and LED grow lights. There is a lot of information online about the best grow lights for microgreens and this could be an entire article! In short, if you are in the market for new lights, I would recommend most T5 LED grow lights.
Steps to Growing:
1. Some seeds germinate better if they are soaked first. These include beets (8-12 hours), peas (12-24 hours), sunflowers (4-8 hours), swiss chard (12-24 hours).
2. Fill pots to the top with moist but not wet soilless mix. Firmly press down and add more mix until it is 1/4'’ (6mm) from the top. It is important to have it close to the top so you can easily harvest your microgreens when they are ready.
3. Sprinkle seeds on top of the mix. Microgreens require dense seeding, there should only be a small space around each seed. Some larger seeds such as sunflowers touch but should not be on top of each other. Press seeds down into the soil but do not cover. Spray seeds with a water bottle one or twice a day to keep moist.
Microgreen
Seeding, Growing, and Harvest Information
|
Variety |
Seeding Rate for
an entire 1020 tray |
Seeding Rate for 8cm
(3”) pot |
Germination Time |
Weighted / Blackout |
Harvest |
|
Alfalfa |
30 g |
1.15 g |
1-2 Days |
3-4 Days |
8-12 Days |
|
Arugula |
20 g |
1 g |
1-2 Days |
4 Days |
10 Days |
|
Basil (Red) |
20 g |
1 g |
3-5 Days |
None, needs light to germinate |
20-30 Days |
|
Beets |
40 g |
2 g |
3-4 Days |
5-6 Days |
10-16 Days |
|
Broccoli |
30 g |
1 g |
1-2 Days |
2-3 Days |
10-14 Days |
|
Clover |
30 g |
1 g |
1-2 Days |
3-5 Days |
7-12 Days |
|
Mustard |
30-36 g |
2 g |
1 Day |
2-3 Days |
7-12 Days |
|
Peas (Yellow) |
200-300 g |
9 g |
2-3 Days |
3-5 Days |
9-12 Days |
|
Radish |
40-60 g |
3 g |
2-3 Days |
2-5 Days |
6-11 Days |
|
Sunflower (Black
Oil) |
100-150 g |
6.75 g |
2-3 Days |
3-4 Days |
9-12 Days |
|
Swiss Chard |
60 g |
3 g |
2-5 Days |
4-7 Days |
8-16 Days |
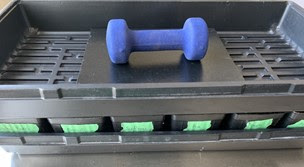
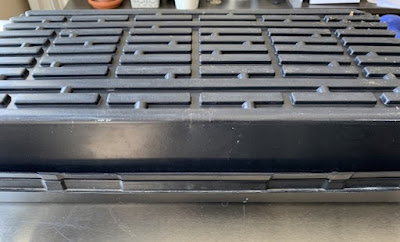
4. Weighted blackout – Most microgreens need to have a weighted blackout period. This allows the germinating seeds to have good contact with the soil so the roots can firmly become established. To accomplish this, you can put another 1020 tray on top of your seeds, and then put a weight (approx. 3-5 lbs) on top of this. Once the seeds have germinated and are pushing on the tray you can remove the weight, flip the tray over (so it’s upside down) and keep the seedlings in blackout until they are about 1” tall. Taking the weight off will allow the microgreen stems to straighten out and the additional darkness will make the microgreens stretch taller.
5. Check on microgreens twice daily. Make sure to keep the soil moist but not saturated. Bottom water as needed; bottom watering also ensures that your seeds will not get displaced.

- Root Hairs – this is not in fact a problem but many people who are first time microgreen growers mistakenly think the root hairs growing on their seedlings are mold. Root hairs are white and fuzzy and very noticeable on some microgreens like radish. If you are uncertain if it is mold vs. root hairs you can lightly water the stems from above, if the white fuzzy look disappears it is root hairs.
- Mold – mold appears more like a stretched-out cotton ball or white spider web; it has long threads. Prevention is the best strategy: make sure growing media is sterile, wash all pots and trays between use, try not to have your seeds too densely packed, do not overwater the plants, make sure trays have drainage holes, and have moving air around your plants.
- There are some seeds like sunflowers that should be sanitized prior to planting to prevent surface mold. To sanitize seed: use a 3% food grade hydrogen peroxide solution. Use 5mL for every 25g of seed. Before pre-soaking the seeds pour the peroxide solution right on the seed and stir. Let soak for 5-10 minutes then pour room temperature water over seeds until they are covered an inch or so. Continue pre-soaking seed for 4-8 hours
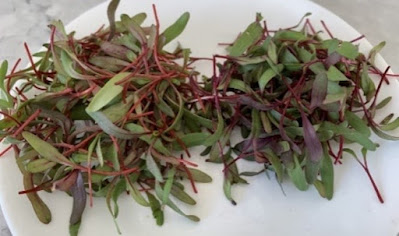
- Dehulling – beet and swiss chard microgreens are beautiful and colourful but they have pesky seed husks (or hulls). The hulls tend to stay on the leaves of the greens. To minimize this, you can cover the seed with more dirt. The extra layer of soil it must go through will loosen the seed hull. You may still have to pick off a few hulls at harvest time but not as many.
- Poor germination of seeds is usually caused by seeds
being too close together or the growing medium being too dry or wet. Ideal temperature for germinating seeds is
between 68-70° F.
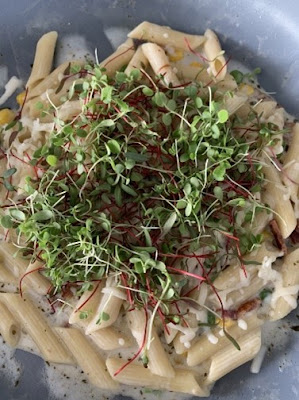
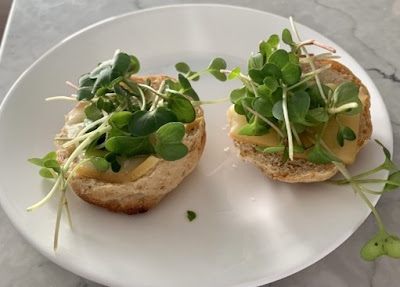
Microgreens add an amazing finishing touch to soups, salads, sandwiches, pasta dishes, and even pizza. They are versatile and an easy to grow. If you are looking for something new to grow indoors that you can enjoy in a week or two try growing microgreens. Happy growing!
*Note these are general growing guidelines that I have had success with. You can find many different resources online with varying seeding rates, weighted blackout times, different light recommendation, etc.


No comments:
Post a Comment