Monday, November 15, 2021

Grow Your Own Bean Sprouts!

Written by Robyn Reist, SHS Blog Editor

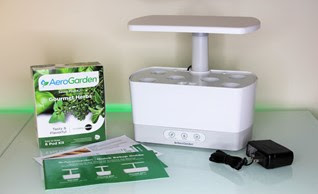
We've run a couple of excellent posts lately about indoor gardening - Karen Trimble's guide to growing microgreens and Brendalynn Ens's introduction to Aerogardening. If you've been intrigued by these hobbies but just aren't sure if you're ready to commit, may I humbly suggest a gateway activity that costs next to nothing and should give you an idea if going larger-scale on indoor food production is right for you!

Early in the pandemic when public health officials were recommending infrequent grocery shopping trips, I found myself really missing certain types of fresh produce. I love to cook several dishes that require mung bean sprouts but anyone who has ever bought bean sprouts from the grocery store will know that they are instant compost fodder within hours of opening the bag! Love bean sprouts but hate the waste, because my household of two cannot eat an entire bag in one sitting.

I decided to try growing them myself and found out that mung bean sprouts are perhaps the easiest indoor food production project out there!

All you need is:

  • Dry mung beans (you can try with regular store bought mung beans, available at Asian groceries or sometimes in the international foods aisle, but I prefer to use sprouting beans from Mumm's to ensure they will be high quality for sprouting)
  • A mason jar
  • Colander or mesh strainer

That's it! No special sprouting lids or trays required.

To grow your bean sprouts:

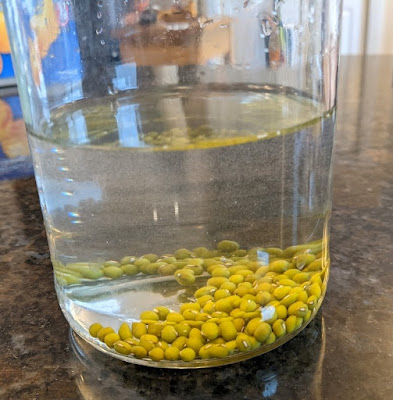
  1. Put a tbsp or two of dry beans into the mason jar.
  2. Cover with a few inches of water and soak for at least 4 hours. Up to 24 is fine - you want them to be fully hydrated and plumped up (I usually remember to start them in the afternoon and let them soak until the following morning).
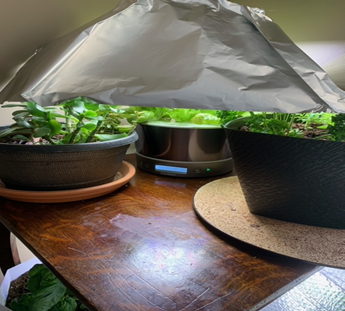
  3. Drain the beans and put them back into the jar. Put the jar in a dark cupboard (this is very important - if you expose them to light they will be bitter and terrible. Ignore all gardening instincts to give growing plants sun!).
  4. Rinse and drain the beans at least twice a day. Four to five times is optimal. If you see the tail end of the sprout drying up or browning, you need to rinse them more often.
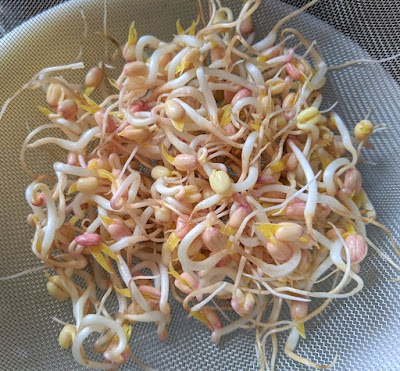
  5. When they have sprouted to your liking, rinse one more time and enjoy! This will take between 3-5 days, depending on the temperature of your cupboard and your personal preference. When some of the beans start turning a bit purple and growing leaves, they are ready.
  6. Optional - I am not a fan of the dark green husks so I usually spend some time removing them. Depending how many beans you have sprouted this can become somewhat time consuming, but I find it kind of meditative. Put all of the beans in a bowl with water - most of the husks will float to the top and can be pulled out easily, however about 1/4 of them will still be stuck to their beans so will need to be removed by hand. (If you can't be bothered with this, it is not a big deal to eat the husks; they are a good source of fibre and have no taste.)

Note: If you grow bean sprouts in a jar, they are unlikely to have long straight shoots like the kind you get from the grocery store. I have read that the best way to get them looking like grocery store sprouts is to grow them in a tray with something weighting down the beans as they grow. One time I overfilled a jar so the beans were quite packed in by the time they were ready and all of the additional pressure created longer, straighter sprouts on the beans. Whatever you can do to limit the amount of space they have to grow will give you longer and straighter sprouts. 

Other types of sprouting seeds will grow with a similar method, but for really tiny seeds like alfalfa you may want to either invest in a special sprouting lid or at very least use cheesecloth for straining after rinsing. The Mumm's website has a huge selection of seeds to choose from along with detailed instructions for how to successfully grow them. 

Store your dry beans/sprouting seeds in the freezer when you are not using them to prolong their life!

Do you have a favourite sprout to grow? Let us know!

Monday, November 1, 2021

The AeroGarden™: Tips for Success Using the Latest Winter Gardening Trend

This article by Brendalynn Ens was originally published in the SHS March 2020 newsletter. Brendalynn is a Master Gardener and member of the SHS Water Gardening Sub-Committee.

Last year, a newer trend in hobby hydroponic gardening really expanded.  AeroGrow International Inc. (the company who manufactures and distributes the AeroGarden™ gardening system kits) reported 224% increase in sales for its last two consecutive financial quarters. This increased interest may be due in part to so many of us at home more during the pandemic. For some of us, it’s a way to continue our water-gardening passion and also an easy mechanism to grow our own salad greens, tomatoes and herbs in the dead of winter! 

AeroGarden™ is a self-contained, in-home “kit” for hydroponic seed growing.  In essence, it's a water and liquid fertilizer mini hydroponic system with its own grow-light system.  The kits are available nearly everywhere and range in price from $120-$250 CDN depending on the size or sale.   Pre-sown pods can be purchased along with general supplies to grown your own seeds.  The system runs on an small internal pump.  How much does it cost to run? 

The standard 6-pod “kit” looks like this (see Figure 1).  Smaller and larger pod kits are also available.

Figure 1

I started my first kit in early fall and quickly got caught up in harvesting fresh herbs and lettuce.  By December 2020 I had purchased a 2nd unit and now they are both still in full operation. Despite the simplicity I appreciate the science and instructions that allow this kit to deliver fresh produce. I joined a Facebook AeroGarden Community group with nearly 20,000 users and found it to be a very valuable forum to trouble-shoot issues and receive support.  Many Facebook group members have 5+ units going year-round and have done so for years (Canada, USA, Australia, New Zealand) so in comparison I am very much a neophyte and only beginning my journey.  

In case you are thinking about getting an AeroGarden or already on your way, I’ve compiled my Top 6 list of things that may be helpful.  Remember, I am no expert here, but I’m learning fast and it’s a great cold-weather distraction.

Top 6 Learnings – AeroGarden™

1.  Really read and follow all instructions.   The instructions are incredibly easy but don’t skip reading them carefully.  Pay particular attention to the precise measurement of liquid fertilizer (4-3-6) and keep ongoing notes to avoid missing top-up fertilizing over time.  Too much fertilizer can result in a hyper-rich nutrient environment and balance that quickly results in algae growth and mucky water. This hasn’t happened to me (so far!) but I’ve heard of others experiencing a green algae bloom mess in their system that required extensive cleaning and a full restart. 

2.  Check water levels weekly and don’t rely on automatic notifications.  Certain plants you may be growing (i.e. lettuce) can result in much more water being used more quickly than what the system automatically advises. Keep an eye on the clarity of the water also – if its getting murky, consider changing it. 

3.  The type of water makes a difference.  While the kit’s instructions recommend a 50/50 mix of distilled and tap water, I use Saskatoon tap water with no issues.  Online experts confirm that hard high-mineral and well water is never recommended and can result in calcium build-up in the internal pump system. 

4.  Synchronize the light timer to be off at night.  Unless you want your AeroGarden fully illuminating your entire kitchen or living room in the dead of night, it is best to set your AeroGarden system to be on with daylight hours.  Most kit lights are programmed to provide 10-12+ hours of growing support to plants.  To avoid having your AeroGarden become a “night-light” in your house, find a suitably sized lampshade or create a folded tinfoil “tent” to reflect the light back onto the plants when it is on.  Figure 2 shows my set-up that benefits other plants nearby as well. 

Figure 2

5.  Use or prune your plants AND their root growth.  The excitement of seeing your vegetables emerge from the pods and mature can be thrilling but similar to how lettuce can ‘bolt’ in the summer heat, the same can happen with this system. Overgrown plants may create unnecessary shade for other plants due to their proximity in the grow system.  Don’t let lanky and unattended plant leaves and stems endlessly grow.  This can happen fast! Pruning and/or use of your herbs and vegetables is no different than in our regular summer gardens. Here’s a video that may help hydroponic plant pruning. Don’t forget the root system also!  Healthy and rapidly growing plants  will have highly developed root systems with risk to get caught in the internal pump system. Figure 3 is a Thyme plant which I cut 1” off the bottom to ensure the roots don’t interfere with the circulation of the water pump system.  Here is more guidance on how to do that. Another option, of course, is to transplant your healthy hydroponic plants to other containers allowing you to start new ones! 

Figure 3

6.  Yes you can transplant the plants into other vessels or devices.  Many experts advocate for using the Kratky method to keep plants long-term. The Kratky method is a next-step hydroponic method that does not involve running or circulating water. If Kratky isn’t your thing, the pods can be also successfully transplanted to soil or soil-less medium. 


In conclusion, I’ve found the AeroGarden™ system to be an easy and successful new trend.  It’s not quite the same as summer water gardening but it has been a welcome distraction from the cold winter days and the stay-at-home orders.