Written by Robyn Reist, SHS Blog Editor
We've run a couple of excellent posts lately about indoor gardening - Karen Trimble's guide to growing microgreens and Brendalynn Ens's introduction to Aerogardening. If you've been intrigued by these hobbies but just aren't sure if you're ready to commit, may I humbly suggest a gateway activity that costs next to nothing and should give you an idea if going larger-scale on indoor food production is right for you!
Early in the pandemic when public health officials were recommending infrequent grocery shopping trips, I found myself really missing certain types of fresh produce. I love to cook several dishes that require mung bean sprouts but anyone who has ever bought bean sprouts from the grocery store will know that they are instant compost fodder within hours of opening the bag! Love bean sprouts but hate the waste, because my household of two cannot eat an entire bag in one sitting.
I decided to try growing them myself and found out that mung bean sprouts are perhaps the easiest indoor food production project out there!
All you need is:
- Dry mung beans (you can try with regular store bought mung beans, available at Asian groceries or sometimes in the international foods aisle, but I prefer to use sprouting beans from Mumm's to ensure they will be high quality for sprouting)
- A mason jar
- Colander or mesh strainer
That's it! No special sprouting lids or trays required.
To grow your bean sprouts:
- Put a tbsp or two of dry beans into the mason jar.
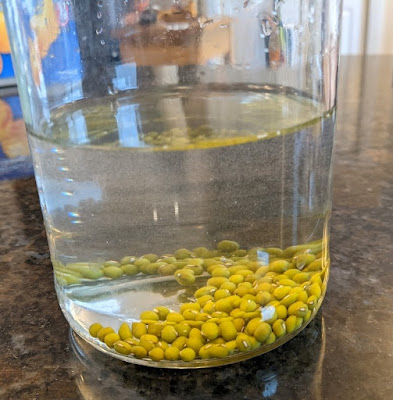
- Cover with a few inches of water and soak for at least 4 hours. Up to 24 is fine - you want them to be fully hydrated and plumped up (I usually remember to start them in the afternoon and let them soak until the following morning).
- Drain the beans and put them back into the jar. Put the jar in a dark cupboard (this is very important - if you expose them to light they will be bitter and terrible. Ignore all gardening instincts to give growing plants sun!).
- Rinse and drain the beans at least twice a day. Four to five times is optimal. If you see the tail end of the sprout drying up or browning, you need to rinse them more often.
- When they have sprouted to your liking, rinse one more time and enjoy! This will take between 3-5 days, depending on the temperature of your cupboard and your personal preference. When some of the beans start turning a bit purple and growing leaves, they are ready.
- Optional - I am not a fan of the dark green husks so I usually spend some time removing them. Depending how many beans you have sprouted this can become somewhat time consuming, but I find it kind of meditative. Put all of the beans in a bowl with water - most of the husks will float to the top and can be pulled out easily, however about 1/4 of them will still be stuck to their beans so will need to be removed by hand. (If you can't be bothered with this, it is not a big deal to eat the husks; they are a good source of fibre and have no taste.)


No comments:
Post a Comment